Two of my greatest earthly loves often produce great inspiration to one another and combine for lasting results… gardening and painting.
Since I was a young girl I have loved growing flowers. I remember studying the shapes and forms of them, how the sunlight would shine through the petals on a backlit flower and watching butterflies, dragonflies and bees played in the garden… even as a child they fascinated me.
This Mammoth Russian Sunflower grew on my hillside garden earlier this summer and I spent a day capturing its beauty to have with me so much longer than one of these beautiful flowers can keep its glory.
What are your favorite flowers of summer? I’d love you to share them in the comments section!
Every time I have set about to redesign our own home’s decor, I run up against the same issue. I simply do not want to look like everyone else’s home. When I try to find bedding , or drapes or pillows that fit “my style” perfectly, I’ve found 1 part success and 9 parts frustration! Does this sound like what you have experienced? Well…
Beautiful Beach, Coastal Home Decor Fabrics for Nautical, Ocean, Shore Decorative Themes.
Technology has provided an answer for those of us that are a little more unique than the masses (some might call it “picky”). Zazzle has now added print on demand fabrics that are manufactured by Manual Woodworkers and Weavers (MWW). MWW is a long time, high quality home decor manufacturer. Their product lines have been sold into the finest of gift shops and home decor stores for decades.
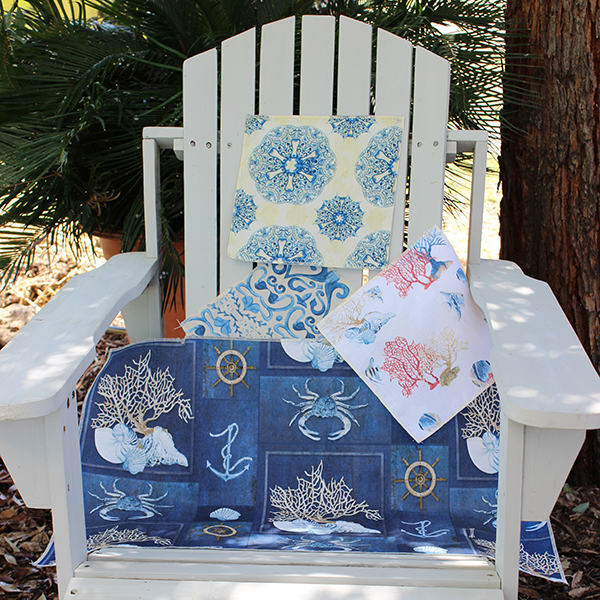
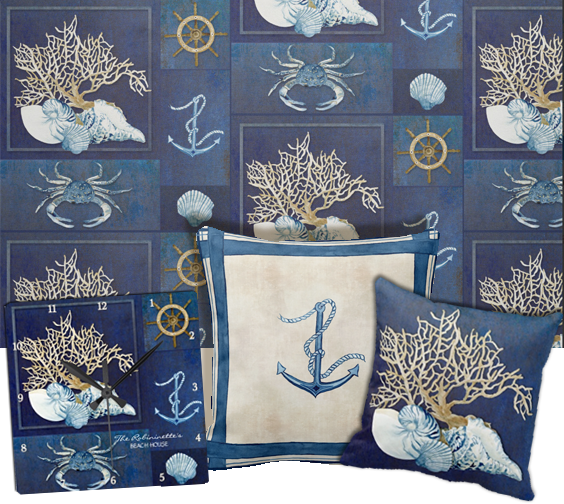
Indigo Ocean Beach House Home Decor Fabrics and Decorative Items with Sea Shells Seashells Nautical Coral Crab and Ship’s Wheel. CLICK ON IMAGE TO GO TO THIS FULL PRODUCT LINE.
I recently ordered samples from Zazzle that were made from my new “Indigo Ocean” art collection. The artwork in the collection was inspired by a wonderful trip my husband and I took to the Bahamas a few years ago. I loved the island’s architecturally rich mix of patterns often found in exuberant and vibrant antique tiles, the fabrics of the women’s dresses, gorgeous beaches and the ever present seashells of the Caribbean. This first fabric is the focal design for the collection. The photo above is Zazzle’s product image which is considerably less vibrant than it actually is. This fabric is the Polyester Poplin which is heavy enough for any upholstery project you might consider.
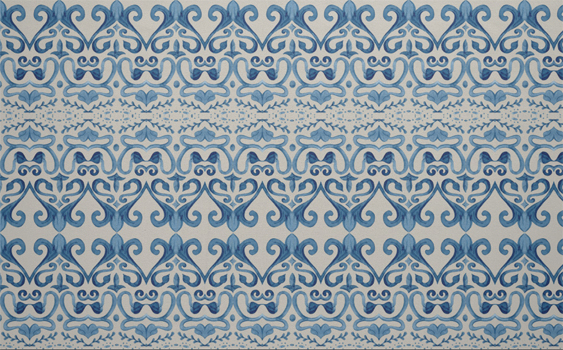
Indigo Ocean Home Decor Fabrics – Caribbean Island repeat pattern CLICK ON IMAGE TO GO TO THIS FABRICLight and Airy Fabric with Red Coral, Tropical Angel Fish and Tan Fan Coral with Conch Shells, Scallop Seashell and a Nautilus Shell. CLICK ON IMAGE TO GO TO THE FULL RANGE OF PRODUCTS AND FABRICS AVAILABLE
This final fabric is one of my favorites and provides a great pattern to use for Duvet covers, curtains and upholstery. It is available with several background color options.
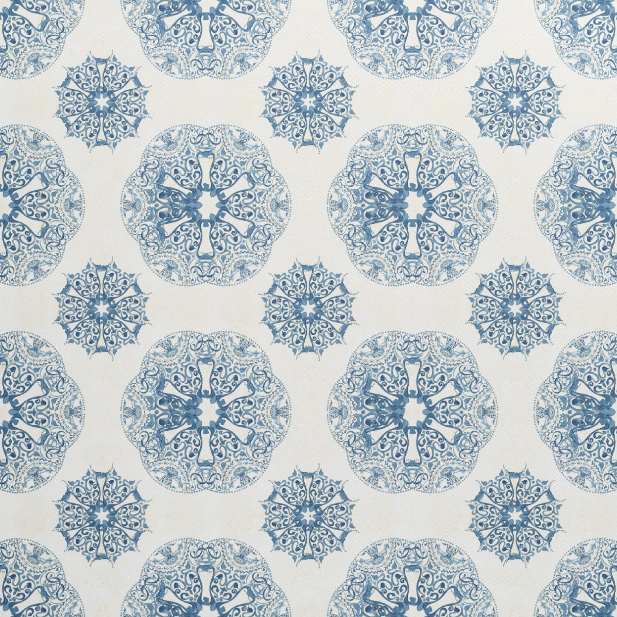
Caribbean Island Inspired Circle Medallion Repeat Pattern Fabric, Indigo Ocean Collection by Audrey Jeanne Roberts CLICK ON IMAGE TO GO TO THE FABRIC IN SHOP
I would love to hear your comments and suggestions on this fabric collection. The artwork has been licensed to a wonderful manufacturer of Home decor products and will be available in stores next year. I’ll let you know more about that when the products are available!
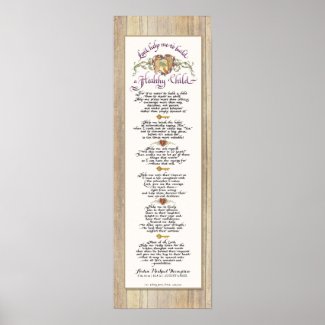
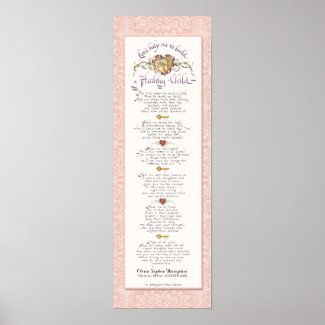
We have had a large quantity of requests in the past month or two for this print that we used to sell matted and framed. We no longer are able to do that, but have made a poster of it available to order at our Audrey Jeanne’s Prints store LINK HERE. This piece is an original text written by Audrey Jeanne that has become a timeless classic to help parents focus on what really matters in parenting.
It is currently available in two styles, but we can create additional backgrounds to compliment the original hand calligraphy art design version.
Lord, Help me to Build a Healthy Child by Audrey Jeanne Roberts
The second version has a lovely damask background with soft shell pink and cream and is of course suitable for little girls.
Simply click on the image and it will take you to these items in our store. You can have them custom framed or simply take the to a local frame shop. Their dimensions are 8″ x 24″ and the full, readable text is available in the descriptions of each of these items in the store.
Girl’s Version, Lord Help me to Build a Healthy Child, copyright Audrey Jeanne Roberts
Inspired by the Candy table image from a wonderful real wedding some years ago, I designed this hot pink fading to orange Infinity Sign wedding invitation set.
Original watercolor modern floral artwork, hand painted by Audrey Jeanne is combined with whimsical, cute, fun birds make a delightful baby shower invitation and party decor items!